How-To


Access Control Access Control

How to Operate Access Control Devices on HikCentral Management Software

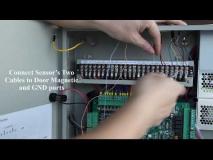
How to Connect Door Sensor to DS K26 G Series Access Controller

How to Connect Electric Bolt to DS K26 G Series Access Controller

How to Connect Electric Strike to DS K26 G Series Access Controller

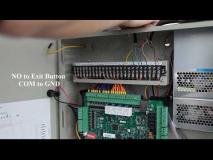
How to Connect Exit Button to DS K26 G Series Access Controller

How to Connect Fire Alarm Signal to DS K26 G Series Access Controller

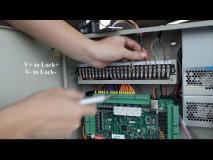
How to Connect Lock with External Power to DS K26 G Series Access Controller

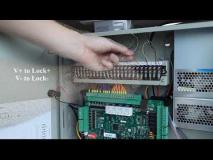
How to Connect Magnetic Lock to DS K26 G Series Access Controller

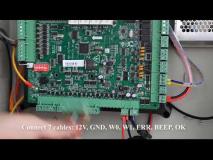
How to Connect Reader to DS K26 G Series Access Controller by RS 485

How to Connect Reader to DS K26 G Series Access Controller by Wiegand

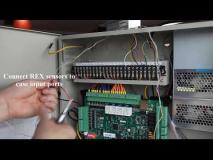
How to Connect REX Sensor to DS K26 G Series Access Controller


Hik-Connect & Mobile Apps Hik-Connect & Mobile Apps

Adding a Device to Hik-Connect with a Browser

View DocumentPDF icon

Creating a Hik-Connect Cloud Account for Remote Mobile Viewing

View DocumentPDF icon

Deleting a Device from a Hik-Connect Account with a Browser

View DocumentPDF icon


Video Intercom & Doorbell Video Intercom & Doorbell

Email Setup on DS-K1T671TM-3XF

Using the latest firmware release, DS-K1T671TM-3XF can send email notifications directly from the terminal, eliminating the dependency on client software for such feature. This document will guide through the necessary pre-requisites and procedures required to setup email notifications on DS-K1T671TM-3XF.


Knowledge Base Link: 
Email Setup on DS-K1T671TM-3XF


DS-HD1 Video Doorbell Part 1: Unboxing and Physical Installation

DS-HD1 Video Doorbell Part 2: Install Hik-Connect and Add/Configure Device

DS-HD1 Video Doorbell Part 3: Operation and Incident Sharing


NVR & DVR NVR & DVR

How to use Two-Way Audio

View DocumentPDF icon

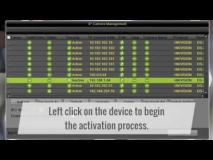
Activating a Hikvision IP Camera on a Network Using an NVR or DVR

View DocumentPDF icon

Powering Up a DVR or NVR

View DocumentPDF icon

Using the DVR or NVR's On-Screen Keyboard

View DocumentPDF icon

Navigating a DVR or NVR on its Local Display

View DocumentPDF icon

Password Reset on a DVR or NVR's Local Display

View DocumentPDF icon

Setting Up Email Notifications on a DVR or NVR

View DocumentPDF icon

Activating a Device in a Web Browser

View DocumentPDF icon

Enabling Hik-Connect Remote Access on a DVR or NVR

View DocumentPDF icon

How To Enable a Privacy Mask Through a DVR or NVR

Upgrading the Firmware on the Hikvision DVR and NVR


IP Camera IP Camera

Solar power camera kit installation video

DS-2TD2617B-6PA High-Accuracy Thermal Camera Installation

View DocumentPDF icon

How To Add a User To a Hikvision Camera

Building Information Modeling with Hikvision Video Surveillance Equipment

How to Set Up E-Mail Notification on Hikvision Cameras

How To Open A Web Page In Windows 10

How To Default a Hikvision Camera

Upgrading the Firmware on the Hikvision IP Camera


IVMS IVMS

Using iVMS-4200 to Remotely View Devices on a Hik-Connect Account

Adding a Device on Hik-Connect Cloud to the iVMS-4200 Client

View DocumentPDF icon

Creating a Hik-Connect Cloud Account Using the iVMS-4200 Client

View DocumentPDF icon

Device Activation Via iVMS-4200

View DocumentPDF icon

iVMS-4200 Part 1: Download, Install, and Login

View DocumentPDF icon

iVMS-4200 Part 2A: Adding Devices with the Wizard

View DocumentPDF icon

iVMS-4200 Part 2B: Adding Devices Manually

View DocumentPDF icon

iVMS-4200 Part 3: Device Groups & Live View

View DocumentPDF icon

iVMS-4200 Part 4: Playback

View DocumentPDF icon

iVMS-4200 Part 5: Copy/Export Video

View DocumentPDF icon


HikCentral HikCentral

Access control & Intercom | a. How Does Access Control Work on HikCentral Pro

Access control & Intercom | b. How to Manage Person List on HikCentral Pro

Access control & Intercom | c. How to Set Emergency Operation Group on HikCentral Pro

Access control & Intercom | d. How Does Time & Attendance Work on HikCentral Pro

Access control & Intercom | e. How Does Video Intercom Device Work on HiKCentral Pro

Installation & Activation | How to Install HikCentral Pro server

Video Module | a. How to Check Live Video on HikCentral Pro

Video Module | b. How to Set Visual Tracking on HikCentral Pro

Video Module | c. How to Play Video Files on HikCentral Pro

Video Module | d. How Does Event & Alarm Work on HikCentral Pro

Video Module | e. How to Set Smart Wall with Decoder on HikCentral Pro

Video Module | f. How Does User & Role Work on HikCentral Pro

Video Module | g. How Does Health Monitoring Work on HikCentral Pro

How To Restore HikCentral Server

View DocumentPDF icon

How to Migrate HikCentral Data

View DocumentPDF icon


Tools And Utilities Tools And Utilities

Unbinding Devices from Hik-Connect Account Using the SADP Tool

Password Reset with the SADP Tool

View DocumentPDF icon

How to Activate a Hikvision Camera Using SADP

Format Converter How To

View DocumentPDF icon

SADP install and Operation How To

View DocumentPDF icon

Local Playback How To

View DocumentPDF icon

MAC VS Player How to

View DocumentPDF icon

VS Player How To

View DocumentPDF icon

Remote Backup How To

View DocumentPDF icon

Install Hikvision Views How To

View DocumentPDF icon

Install Batch Configuration How To

View DocumentPDF icon

Disk Calculator How To (V4.0.0.2)

View DocumentPDF icon


Cybersecurity Cybersecurity

How to Protect Your IP Video Network


Legacy Legacy

Adding a Device on Hik-Connect Cloud to the iVMS-4500 Mobile App

View DocumentPDF icon

Creating a Hik-Connect Cloud Account using the iVMS-4200 Mobile App

View DocumentPDF icon

IMPORTANT! Ce modèle nécessite un logiciel non standard. N'installez pas de logiciel standard (par exemple, v.4.1.xx) sur ce modèle. Cela endommagerait définitivement votre système. Vous devez utiliser le logiciel personnalisé v.4.1.25 à partir de la page du produit iDS-9632NXI-I8/16S

View the most updated version of this document here:

https://techsupportca.freshdesk.com/en/support/solutions/articles/17000113531-i-series-nvr-firmware-upgrade-instructions


The I-series NVR (such as the DS-7716NI-I4) is one of Hikvision's most popular and feature-rich recorders. As such, many firmware revisions have been introduced over the years to continually ensure the product is compatible with the newest technology available. Due to the many revisions, we recommend that the user closely follows the instructions below in order to reduce the amount of time spent as well as the chance of failure.


Database Optimization and Repair

As more affordable IP cameras are introduced over time with greater video resolution and data sizes, more efficient database management also becomes necessary. The introduction of firmware v4.0 brought about a new database architecture in order to be futureproof.


After upgrading to v4.X, the recorder database will need to be converted and optimized. If you are experiencing issues where playback is expected but not found, make sure "Database Repair" is performed as indicated in the procedures and scenarios below.


Preparing the Upgrade

Before proceeding with upgrade, it is recommended that NVR configuration file is exported from the NVR over the network or on to a local USB drive.


Upgrading from v3.4.92 build 170518 or Older

  1. All recorders must reach v3.4.92 before proceeding further. Upgrading from versions before v3.4.92 directly to any version of v4.X will likely cause the recorder to fail.
  2. If the recorder is already at v3.4.92, a full factory default is highly recommended before upgrading to any version of v4.X. There is a high chance of unit failure (requiring RMA) if the unit is not defaulted before upgrade.
  3. After reaching v3.4.92 and performing a full factory default, an upgrade directly to v4.50.00 is acceptable.
  4. After the upgrade is completed and the recorder is reprogrammed, it may be beneficial to perform a Database Repair. For details, refer to the section "Database Optimization and Repair" above.
  5. To verify repair progress, you may refer to the HDD status, or search the recorder log for repair started and stopped entries. Note that while the HDD is repairing, new recordings are still being made, but some existing recordings may not be searchable until repair is complete.
  6. If you continue to observe playback issues after database repair, ensure there are no power, network, or motion detection issues. Should the problem persist, contact technical support.


Upgrading from Any v4.X Build to v4.50.00.

  1. Any v4.X build can be upgraded directly to v4.50.00.
  2. Export configuration is highly recommended before performing the upgrade.
  3. If upgrading from any v4.X version that was not v4.22.005, a Database Repair is recommended. Refer to Step 4 and onwards in the previous section.


Downgrading

Downgrading is not recommended. Due to new features and parameters constantly being added, downgrading may cause the NVR to factory default itself or require a manual default to operate properly.

View the most updated version of this document here:
K-Series DVR upgrade instruction
The Turbo 4 Hybrid DVR K series has multiple models and across different platform and chipset. It also has similar firmware development of other recording product line; DVR K series has also introduced the GUI4.0 to ensure the series to be compatible to the newest technology available. The new database architecture is also brought into the DVR firmware v4.0 to be future proof and for better recording search experience. 


Database Optimization and Repair

As more affordable cameras introduced over time with greater video resolution and data sizes, more efficient database management also becomes necessary. The introduction of firmware v4.0 brought about a new database architecture in order to be futureproof.
After upgrading to v4.X, the recorder database will need to be converted and optimize. If you are experiencing issues, where playback is expected but not found, please make sure to perform "Database Rebuild" as indicated in the procedures and scenarios below.


Preparing the Upgrade

Before proceeding with upgrade, it is recommend exporting DVR configuration file from the DVR over the network or on to a local USB drive.


Action after firmware upgraded 

1. Upgrade the DVR according to the chart above. 

2. Reconfirming Channel's Recording Schedule 

    - Confirm channel's recording schedule is enable. 

    - Check if the channel is on correct recording schedule.

3. Double Check Storage Setting

    - Make sure all channel are assigned to record on its HDD group when the Storage setting is under Group Mode. 

4. Perform Database Rebuild locally. 

    • Some version above support Database Rebuild via web access - K51 and K72

    • Perform Database Rebuild regardless if system is having any database issue symptom. 

    • Database Rebuild process is average ~30 to 60min per TB. The process may still varies depends recording data.

    • After Database Rebuild - Check log to confirm Database Rebuild has went thru properly. 

    • If Database Rebuild Started and Stopped log has been log only within few minutes. Database rebuild may not has been completed properly. It is strongly recommend performing the Database Rebuild again.

    • To check log > System > Log > Information > Database Rebuild Started and Stopped.

    • If the log option is not available - access system via SSH can also obtain similar result.

5. Recording Data is still missing after database rebuild process. 

If the data has not been recorded or has been overwritten, Database rebuild process is not able retrieve those lost data. Have the system upgraded to the latest available firmware version above to prevent any future data lost is strongly recommended for all application.


In light of the global semiconductor shortage, Hikvision has made some hardware changes to the DS-76xxNI-Q1(2)/P NVRs, also known as “Q series.”


These changes do not have any effect on the performance, specifications, or the user interface of the NVRs. For the ease of reference, these modified units are known as “C-Version” units. This is clearly indicated on the NVR label and on the box by the serial number.
 

The only difference between the “C-Version” and “non-C-Version” is the firmware. The firmware is not interchangeable:


  • The C-Version NVRs must use firmware version v4.31.102 or higher.
  • The non-C-Version (Q series) NVRs must use firmware version v4.30.085 or older.


Please do not be alarmed if a “Firmware Mismatch” message pops up on the screen during the firmware upgrade. This simply means that the firmware does not match the NVR’s hardware. Simply download the correct firmware and the upgrade will go through without any issue.

In light of the global semiconductor shortage, Hikvision has made some hardware changes to the Value Express Series NVRs

These changes do not have any effect on the performance and specification of the recorders. For ease of reference, these modified units are known as “C-Version” units. This is clearly indicated on the NVR label and on the box by the serial number.

The only difference between the “C-Version” and “non-C-Version” is the firmware. The firmware is not interchangeable:

  • The C-Version NVRs must use firmware version v4.30.216 or higher.
  • The non-C-Version (Q series) NVRs must use firmware version v3.4.104 or older.

Please do not be alarmed if a “Firmware Mismatch” message pops up on the screen during the firmware upgrade. This simply means that the firmware does not match the NVR’s hardware. Simply download the correct firmware and the upgrade will go through without any issue.

En téléchargeant et en utilisant des logiciels et autres matériels disponibles sur ce site, vous acceptez d'être lié par les Conditions Générales d'Utilisation de HIKVISION. Si vous n'acceptez pas ces conditions, vous ne pouvez télécharger aucun de ces documents. Si vous êtes d'accord sur votre entreprise, vous déclarez et garantissez que vous avez le pouvoir de lier votre entreprise aux Conditions Générales d'Utilisation . Vous déclarez et garantissez également que vous avez l'âge légal de la majorité dans la juridiction dans laquelle vous résidez (au moins 18 ans dans de nombreux pays).